


Table of contents
By default, Flutter has no animation when navigating from one Screen to another Screen. But in this tutorial, we are going to learn how to animate the Screen Transition.
Project Setup
Before directly applying to your existing project, practice the code in some example projects. For this tutorial, we are going to name our project screen_animation_tutorial. Open in VSCode or Android Studio.
After that, we will make two Screens. The first Screen will be the Starting screen and the next Screen will be the Final Screen. So go ahead and create two dart files under the lib folder.
The main.dart file code should look like this
import 'package:flutter/material.dart';
import 'package:screen_animation_tutorial/start_screen.dart';

void main() {
  runApp(MyApp());
}

class MyApp extends StatelessWidget {
  // This widget is the root of your application.
  @override
  Widget build(BuildContext context) {
    return MaterialApp(
      title: 'Flutter Demo',
      theme: ThemeData(
        primarySwatch: Colors.yellow,
      ),
      home: StartScreen(),
    );
  }
}
The start_screen.dart should look like this.
import 'package:flutter/material.dart';
import 'package:screen_animation_tutorial/final_screen.dart';

class StartScreen extends StatelessWidget {
  const StartScreen({Key? key}) : super(key: key);

  @override
  Widget build(BuildContext context) {
    return Scaffold(
      appBar: AppBar(
        title: Text('Start'),
      ),
      body: Container(
        color: Colors.yellow[200],
        child: Center(
          child: Column(
            mainAxisAlignment: MainAxisAlignment.center,
            children: [
              Text(
                'Start',
                style: TextStyle(fontSize: 48.0),
              ),
              ElevatedButton(
                onPressed: () {
                  Navigator.push(
                    context,
                    MaterialPageRoute(
                      builder: (_) => FinalScreen(),
                    ),
                  );
                },
                child: Text(
                  'Final',
                  style: TextStyle(
                    fontSize: 32.0,
                    fontWeight: FontWeight.w700,
                  ),
                ),
              ),
            ],
          ),
        ),
      ),
    );
  }
}
The final_screen.dart should look like this.
import 'package:flutter/material.dart';

class FinalScreen extends StatelessWidget {
  const FinalScreen({Key? key}) : super(key: key);

  @override
  Widget build(BuildContext context) {
    return Scaffold(
      appBar: AppBar(
        title: Text('Final'),
      ),
      body: Container(
        color: Colors.red[200],
        child: Center(
          child: Text(
            'Final',
            style: TextStyle(fontSize: 48.0),
          ),
        ),
      ),
    );
  }
}
Run the app. It should look as below.
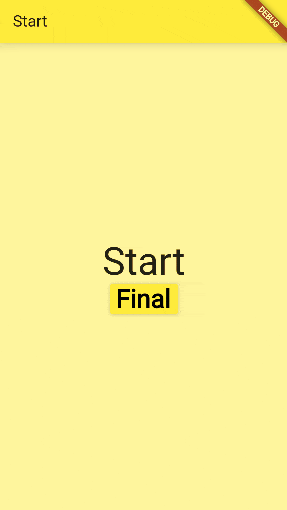
Code
Now we will implement the animation.
So in the start_screen.dart we have put the code for navigation inside the ElevatedButton widget.
onPressed: () {
  Navigator.push(
    context,
    MaterialPageRoute(
      builder: (_) => FinalScreen(),
    ),
  );
},
Replace the MaterialPageRoute with PageRouteBuilder. It creates a Route that delegates to builder callbacks.
PageRouteBuilder(
  pageBuilder: (BuildContext context,
                Animation<double> animation,
                Animation<double> secondaryAnimation) {},
  ),
);
Inside the pageBuilder curly braces we the return Final Screen.
pageBuilder: (BuildContext context,
              Animation<double> animation,
              Animation<double> secondaryAnimation) {
  return FinalScreen();
},
Now add transitionBuilder in the PageRouteBuilder.
transitionsBuilder:
    (context, animation, secondaryAnimation, child) {
},
Now it is the most interesting part.
Here we will put how do we want our animation. So I want pop-in animation. So I am going to use ScaleTransition. If you want the Scrolling animation you can use Sliding Animation. You can use a bunch of animation with Flutter. Go ahead and try out all. Here I am going to use ScaleTranstion.
transitionsBuilder:
(context, animation, secondaryAnimation, child) {
  return ScaleTransition(
    alignment: Alignment.center,
    scale: Tween<double>(begin: 0.1, end: 1).animate(
      CurvedAnimation(
        parent: animation,
        curve: Curves.bounceIn,
      ),
    ),
    child: child,
  );
},
Here we can also use custom duration using the transitionDuration field.
transitionDuration: Duration(seconds: 2),
So we have completed the tutorial. The basic types of animation are:
FadeTransition
SizeTransition
AlignTransition
ScaleTransition
PositionedTransition
Here is the full code of start_screen.dart in case you missed or couldn't follow.
import 'package:flutter/material.dart';
import 'package:screen_animation_tutorial/final_screen.dart';

class StartScreen extends StatelessWidget {
  const StartScreen({Key? key}) : super(key: key);

  @override
  Widget build(BuildContext context) {
    return Scaffold(
      appBar: AppBar(
        title: Text('Start'),
      ),
      body: Container(
        color: Colors.yellow[200],
        child: Center(
          child: Column(
            mainAxisAlignment: MainAxisAlignment.center,
            children: [
              Text(
                'Start',
                style: TextStyle(fontSize: 48.0),
              ),
              ElevatedButton(
                onPressed: () {
                  Navigator.push(
                    context,
                    PageRouteBuilder(
                      transitionsBuilder:
                          (context, animation, secondaryAnimation, child) {
                        return ScaleTransition(
                          alignment: Alignment.center,
                          scale: Tween<double>(begin: 0.1, end: 1).animate(
                            CurvedAnimation(
                              parent: animation,
                              curve: Curves.bounceIn,
                            ),
                          ),
                          child: child,
                        );
                      },
                      transitionDuration: Duration(seconds: 2),
                      pageBuilder: (BuildContext context,
                          Animation<double> animation,
                          Animation<double> secondaryAnimation) {
                        return FinalScreen();
                      },
                    ),
                  );
                },
                child: Text(
                  'Final',
                  style: TextStyle(
                    fontSize: 32.0,
                    fontWeight: FontWeight.w700,
                  ),
                ),
              ),
            ],
          ),
        ),
      ),
    );
  }
}
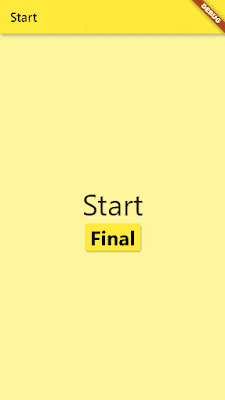
Run the app now.
Result
The final app looks like below.
Hope you enjoyed the tutorial and learned something new. If you have any problems comment below