

Applications may have multiple screens and users may want to jump to different screens. Placing every element on a single screen is not a feasible solution. Hence navigation comes into the role and allows the developers to place different components on different screens.
In this tutorial, we are going to learn to navigate to and from the screen.
Create two routes
Navigate to a new screen
Navigate back to the first screen
In Flutter, we can navigate to different screens with the help of Navigator. The Navigator widget is used to manage a set of child widgets(i.e. screens) according to stack discipline(structure). The Navigator manages the screens and pages(also called Full-Screen widgets in Flutter) with the help of routes.
Syntax
The basic syntax for Navigator to navigate to a new screen is as follows:
Navigator.push(
  context,
  MaterialPageRoute(
    builder: (context) => const SecondScreen(),
  ),
);
And for Navigate back, the following is the syntax.
Navigator.pop(context);
Below is an example given demonstrating the Navigation in a Flutter app.
Step 1: Create two routes
We will start by creating a new project. To create a new project.
flutter create aaf_navigation
Then create the following two screens.
first_screen.dart
second_screen.dart
They will contain a Text widget and an Elevated Button widget to navigate to and from the screen respectively. They will contain the UI only.
The project structure is as follows:
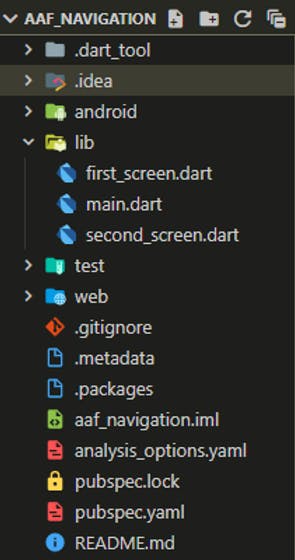
main.dart
import 'package:flutter/material.dart';
import 'first_screen.dart';

void main() {
  runApp(const MyApp());
}

class MyApp extends StatelessWidget {
  const MyApp({Key? key}) : super(key: key);

  @override
  Widget build(BuildContext context) {
    return const MaterialApp(
      title: 'AAF Navigation',
      home: FirstScreen(),
    );
  }
}
first_screen.dart
import 'package:flutter/material.dart';

class FirstScreen extends StatefulWidget {
  const FirstScreen({Key? key}) : super(key: key);

  @override
  State<FirstScreen> createState() => _FirstScreenState();
}

class _FirstScreenState extends State<FirstScreen> {
  @override
  Widget build(BuildContext context) {
    return Scaffold(
      appBar: AppBar(
        title: const Text('First Screen'),
      ),
      body: Center(
        child: ElevatedButton(
          onPressed: () {},
          child: const Text('Go to Second Screen'),
        ),
      ),
    );
  }
}
second_screen.dart
import 'package:flutter/material.dart';

class SecondScreen extends StatefulWidget {
  const SecondScreen({Key? key}) : super(key: key);

  @override
  State<SecondScreen> createState() => _SecondScreenState();
}

class _SecondScreenState extends State<SecondScreen> {
  @override
  Widget build(BuildContext context) {
    return Scaffold(
      appBar: AppBar(
        title: const Text('Second Screen'),
      ),
      body: Center(
        child: ElevatedButton(
          onPressed: () {},
          child: const Text('Return Back'),
        ),
      ),
    );
  }
}
Step 2: Create a route to navigate to the second screen
After creating the UI, now it is time to create Route. So in the first screen, you need to import the second_screen.dart file and then add the Navigator function.
first_screen.dart
import 'second_screen.dart';
Then add the Navigator function in the ElevatorButton onPressed() callback function.
first_screen.dart
ElevatedButton(
  onPressed: () {
    Navigator.push(
      context,
      MaterialPageRoute(
        builder: (context) => const SecondScreen(),
      ),
    );
  },
  child: const Text('Go to Second Screen'),
),
Step 3: Navigate back to the first screen.
In the second_screen.dart file, add the Navigator.pop(context) to the onPressed() callback of the ElevatedButton as follows:
second_screen.dart
ElevatedButton(
  onPressed: () {
    Navigator.pop(context);
  },
  child: const Text('Return Back'),
),
Now run the application.
Output