We use Drawer in applications because we cant fit the tabs due to several reasons. A reason may be that the option is not suitable to be visible on application homepage or a common topic. Like an About Page, Contact page cannot be placed on the tabs, so Drawer is introduced. In Flutter apps, there are broadly two ways of navigation:
Drawer
In this tutorial, we are going to learn the Drawer widget.
Contents
Drawer Widget
Example Code
Result
Conclusion
Drawer Widget
We can use anything in place of Drawer widget, but a Drawer widget is provided by Material library of Flutter. We place the Drawer widget in the drawer field of the
The Drawer widget normally comprises of following things although we can place anything.
child: We use ListView in this field because generally we place a lot of options here.
backgroundColor: Colour for the background of Drawer widget.
shape: If you want different shape of Drawer rather than rectangle, this option is for you.
elevation: The Drawer widget has an elevation over current layer. So there is an shadow to the container. This option helps to change the default value of 16.0.
semanticLabel: Allows frameworks know when the drawer is opened or closed.
Example Code
In the Scaffold widget, we have a parameter as drawer. We can provide any widget but we are going to use the Drawer widget.
Scaffold(
  drawer: Drawer(),
)
Inside the Drawer widget, we are going to assign a ListView to the child field.
Drawer(
  child: ListView(
    children: const [],
  ),
)
We will add a DrawerHeader widget that appears as heading the Drawer widget and below that some ListTiles.
Drawer(
  child: ListView(
    children: const [
      DrawerHeader(
        child: Center(
          child: Text(
            "Welcome to AllAboutFlutter.com",
          ),
        ),
        decoration: BoxDecoration(color: Colors.blue),
      ),
      ListTile(
        title: Text("Website for Flutter"),
      ),
      ListTile(
        title: Text(
          "Subscribe to get notified for new tutorials.",
        ),
      ),
    ],
  ),
)
So our code is complete
Result
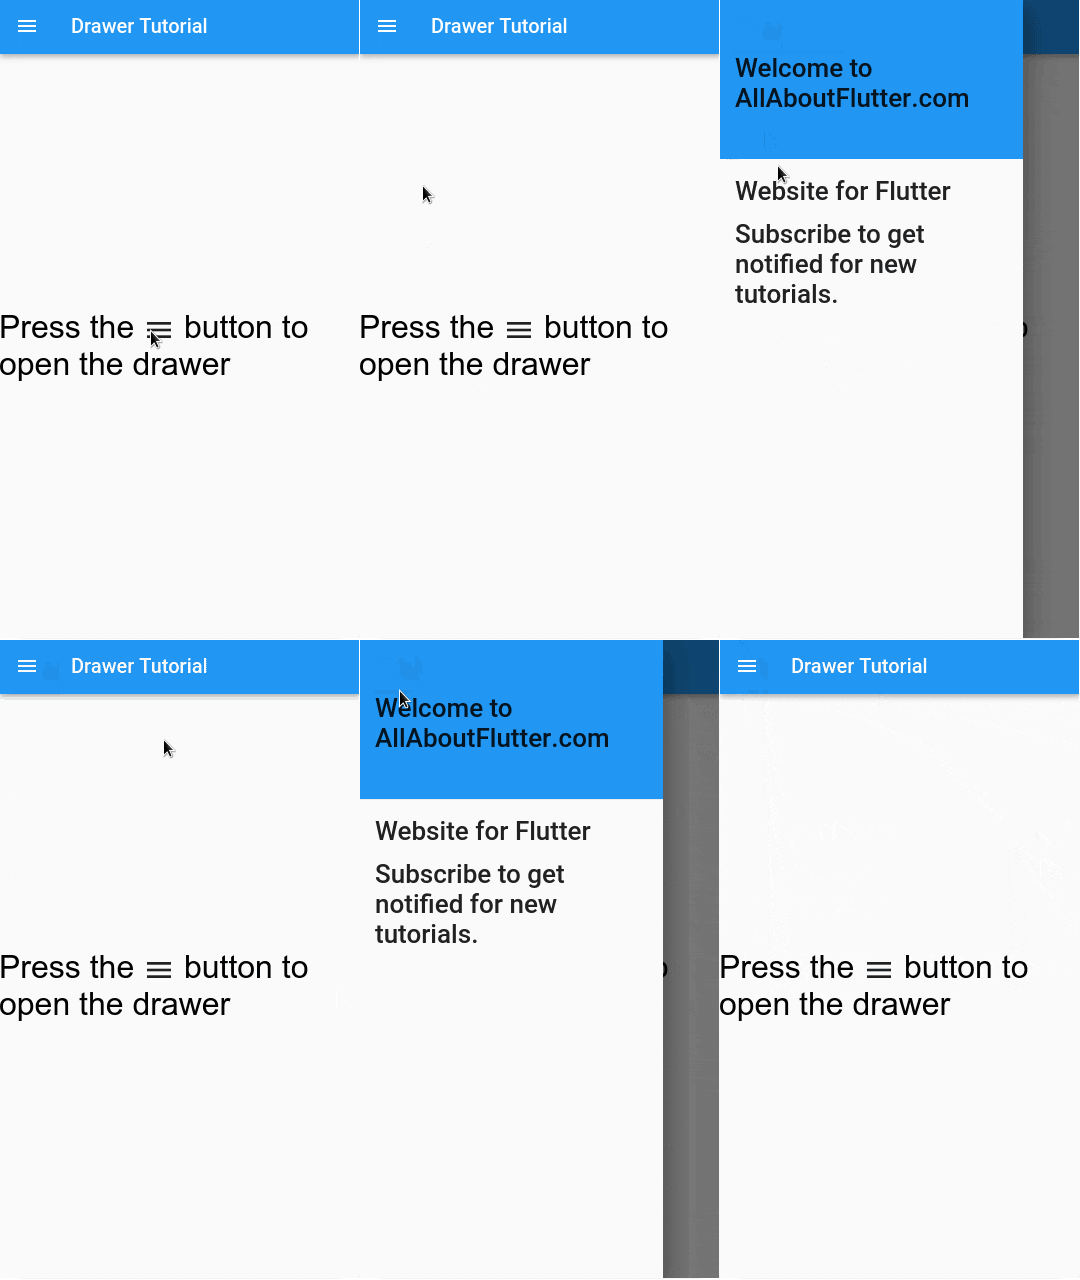
Here is the final result as you can see. We have the menu bar automatically implemented, and the animations are also implemented by default.

Here is the full code.
class DrawerTutorial extends StatelessWidget {
  const DrawerTutorial({Key? key}) : super(key: key);

  @override
  Widget build(BuildContext context) {
    return Scaffold(
      appBar: AppBar(
        title: const Text("Drawer Tutorial"),
      ),
      drawer: Drawer(
        child: ListView(
          children: const [
            DrawerHeader(
              child: Center(
                child: Text(
                  "Welcome to AllAboutFlutter.com",
                ),
              ),
              decoration: BoxDecoration(color: Colors.blue),
            ),
            ListTile(
              title: Text("Website for Flutter"),
            ),
            ListTile(
              title: Text(
                "Subscribe to get notified for new tutorials.",
              ),
            ),
          ],
        ),
      ),
      body: Center(
        child: Wrap(
          alignment: WrapAlignment.spaceAround,
          children: [
            RichText(
              text: const TextSpan(
                text: "Press the ",
                style: TextStyle(color: Colors.black, fontSize: 32),
                children: [
                  WidgetSpan(
                      child: Icon(
                    Icons.menu,
                    size: 32,
                  )),
                  TextSpan(text: " button to open the drawer"),
                ],
              ),
            ),
          ],
        ),
      ),
    );
  }
}
Conclusion
So we learn to create Drawer widget. The Drawer widget is very helpful for placing all the links in our application which could not be fitted anywhere else. Drawers help to make navigation even smoother. If you have any doubt, comment below.

