


Biometric authentication in the Flutter app allows developers to allow only authenticated users to access the application. Using the biometric hardware of the device, developers can use the device platform APIs to authenticate users before accessing the application. This helps the user to not remember PIN or Password, they can use their device password only. So let's start.
Create the project
This is the primary step and the simplest. Create a project by using the following command
flutter create biometric_authentication_example
Install required plugins
For implementing biometric authentication, we will use the local_auth plugin as follows:
flutter pub add local_auth
Checking device capabilities
Before proceeding, it is better to check if the device has the hardware available for biometric authentication. In that case, we have to add another method of authentication. (But that is not part of the tutorial)
So to check if the user's device has the hardware or not, we use the following code.
final LocalAuthentication auth = LocalAuthentication();
void supportedBiometricAuth() async {
  final bool canAuthenticateWithBiometrics = await auth.canCheckBiometrics;
  if (canAuthenticateWithBiometrics && await auth.isDeviceSupported()) {
    showScaffoldBanner('Device Supported');
  } else {
    showScaffoldBanner('Device not Supported');
  }
}
canCheckBiometrics: It only checks if the device has biometrics available or not.
isDeviceSupported(): It returns true if the device is capable of checking biometrics or can fail over to device credentials.
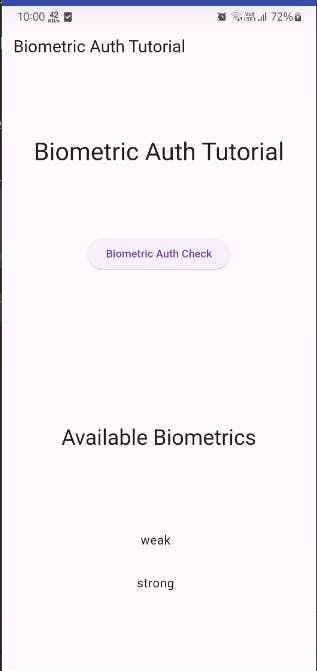
Getting list of available biometrics
There are multiple of biometrics available such as
Fingerprint
Face
available here. To display it, run the following command:
final res = await auth.getAvailableBiometrics();
setState(() {
  _availableBiometrics = res; // saving in a list variable
});
Let us see the output, using the following code
Center(
  child: Column(
    mainAxisAlignment: MainAxisAlignment.spaceEvenly,
    children: <Widget>[
      Text(
        'Available Biometrics',
        style: Theme.of(context).textTheme.headlineMedium,
      ),
      ListView.builder(
        itemCount: _availableBiometrics.length,
        shrinkWrap: true,
        itemBuilder: (BuildContext context, int index) {
          return ListTile(
            title: Text(
              _availableBiometrics[index].name,
              textAlign: TextAlign.center,
            ),
          );
        },
      ),
    ],
  ),
),
Authenticate Some content
Suppose we want to see how much balance is in our account. Of course, it is not a public thing to show, so we want the user to be authenticated.
String _yourBalance = '';
This is empty since we will fetch only if the user is authenticated.
We will use auth.authenticate() method to check if the user is authenticated or not. So let us use it
void authenticate() async {
  bool authenticated = false;
  try {
    authenticated = await auth.authenticate(
      localizedReason: 'Scan your fingerprint to authenticate',
    );
  } catch (e) {
    print(e);
  }
  if (!mounted) return;
  final String message = authenticated ? 'Authorized' : 'Not Authorized';
  if (authenticated) {
    setState(() {
      _yourBalance = 'Your Balance is \$1000';
    });
  }
  showScaffoldBanner(message);
}
Here is the output
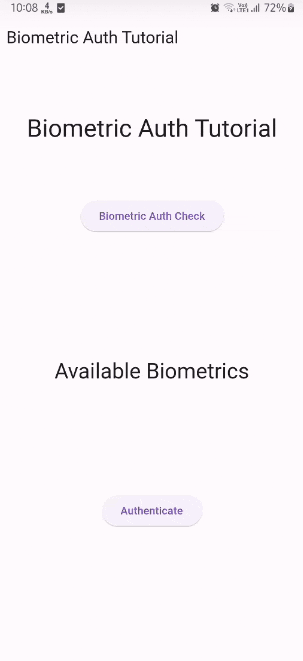
The output contains a black screen since we cannot record the authentication screen, hence you can experience on your physical device.
Here is the full code