


Table of contents
Language Translation is a difficult task and training our model for it makes it even Harder. But Google MLKit makes the task easier. Google's machine learning expertise is now available to mobile developers with Google ML Kit. This package is easy to use and powerful, offering solutions optimized for device performance on both iOS and Android. By the end of this tutorial, you will learn to use Google ML Kit and how to make a Language translation app.
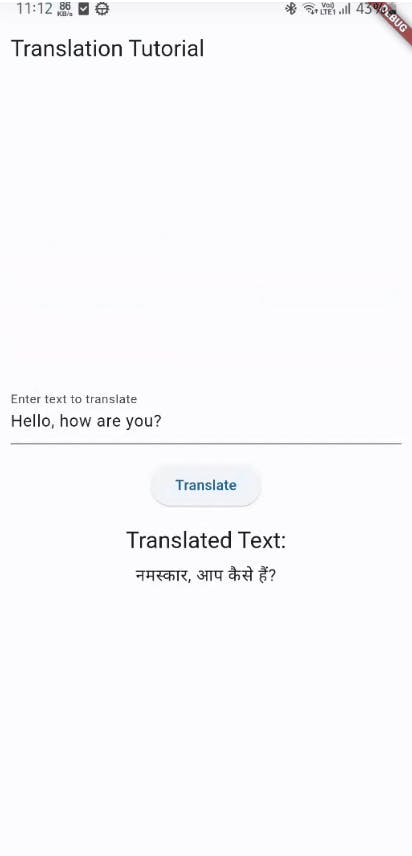
Here is the final output of the app.
Install the library
The first step is to install the library in the project.
flutter pub add google_mlkit_translation
For more details, visit google_mlkit_translation | Flutter package (pub.dev)
After installation, we are ready to use it.
Note: For Android and IOS, there are different configurations to be done before usage, so follow the installation guide at the above link.
Simple Translation in Flutter
So when we do translation using MLKit, we need to first specify the source language, then the target language. The language is specified by the TranslateLangugae enum. Suppose we want to convert from English to Hindi, we will specify the languages as follows:
final TranslateLanguage sourceLanguage = TranslateLanguage.english;
final TranslateLanguage targetLanguage = TranslateLanguage.hindi;
We need to feed the source and target language to a Translator which will download an offline model(a Translation Model is downloaded).
OnDeviceTranslator onDeviceTranslator = OnDeviceTranslator(
  sourceLanguage: sourceLanguage,
  targetLanguage: targetLanguage,
);
Now we need to translate the text. For translation, we call the method translateText() of the translator as follows:
Future<String> translateText(String sourceText) async {
  final String translation =
      await onDeviceTranslator.translateText(sourceText);
  return translation;
}
This is an asynchronous method which takes the source text and converts it into target-language text.
Also, before leaving the app, we need to dispose of the translator.
@override
void dispose() {
  onDeviceTranslator.close();
  super.dispose();
}
Then we can create a simple Translation UI using a TextField now. So we create a TextField and a Button which on press would take the TextField text using the TextEdittingController and finally display the translated text. Here is the full code:
import 'package:flutter/material.dart';
import 'package:google_mlkit_translation/google_mlkit_translation.dart';

class TranslationTutorial extends StatefulWidget {
  const TranslationTutorial({super.key});

  @override
  State<TranslationTutorial> createState() => _TranslationTutorialState();
}

class _TranslationTutorialState extends State<TranslationTutorial> {
  final TranslateLanguage sourceLanguage = TranslateLanguage.english;
  final TranslateLanguage targetLanguage = TranslateLanguage.hindi;

  final TextEditingController _textEditingController = TextEditingController();
  String _translatedText = '';
  late OnDeviceTranslator onDeviceTranslator;

  Future<String> translateText(String sourceText) async {
    final String translation =
        await onDeviceTranslator.translateText(sourceText);
    return translation;
  }

  @override
  void initState() {
    super.initState();
    onDeviceTranslator = OnDeviceTranslator(
      sourceLanguage: sourceLanguage,
      targetLanguage: targetLanguage,
    );
  }
  @override
  void dispose() {
    onDeviceTranslator.close();
    super.dispose();
  }

  @override
  Widget build(BuildContext context) {
    return Scaffold(
      appBar: AppBar(
        title: const Text('Translation Tutorial'),
      ),
      body: Padding(
        padding: const EdgeInsets.all(16.0),
        child: Column(
          mainAxisAlignment: MainAxisAlignment.center,
          children: <Widget>[
            TextField(
              controller: _textEditingController,
              decoration: const InputDecoration(
                labelText: 'Enter text to translate',
              ),
            ),
            const SizedBox(height: 16.0),
            ElevatedButton(
              onPressed: () async {
                final String sourceText = _textEditingController.text;
                final String translatedText = await translateText(sourceText);
                setState(() {
                  _translatedText = translatedText;
                });
              },
              child: const Text('Translate'),
            ),
            const SizedBox(height: 16.0),
            Text(
              'Translated Text:',
              style: Theme.of(context).textTheme.headline6,
            ),
            const SizedBox(height: 8.0),
            Text(
              _translatedText,
              style: Theme.of(context).textTheme.bodyText1,
            ),
          ],
        ),
      ),
    );
  }
}
The code is simple to understand with a few widgets and using the function. Here is the output.
It may take some time based on the internet speed because initially the model is downloaded and then saved.
In the second part, we will make a complete Any-Any language translation app.
Language Translation using MLKit in Flutter - Part 2 (allaboutflutter.com)